Nail art
Nail art
 |
 |
I helped out with the Nail Art classes at NYCR in 2013 and 2015. Shelby and Colleen AF Venable taught us how to use the laser cutter to make custom transfers with very fine details. It's pretty easy and doesn't involve fingers in the laser.
 |
 |
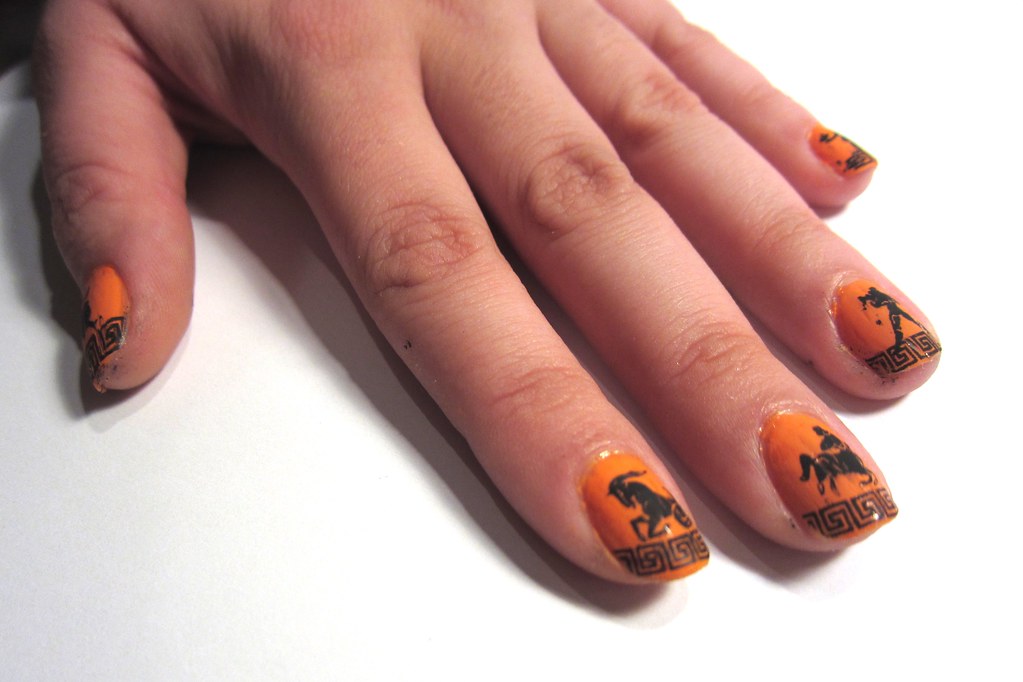
For the 2015 class I used "SaGreena the Teenage Witch" color for the classic green PCB base, or "High Roller" purple for the OSHpark version. The traces were silver "Oyster Bar" or some nondescript gold color. The process is multi-step and starts with two coats of the base color already applied to your nails and given time to dry.
 |
 |
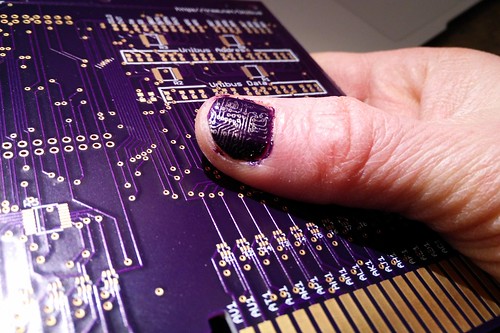
Laser cut the image into acrylic. Fine lines and not too deep seem to work best - 100% speed and 50% power seems to work. If the etching is too deep there will be too much ink and it will smear rather than transfer a clean image. Then "ink" the plate with the nail polish and use a squeegee (or an old credit card) to wipe away the excess polish. This leaves the nail polish only in the grooves. Thicker polish works better -- if it is too thin and runny it won't stay in the plate.
 |
 |
Press the rubber stamp firmly against the plate to transfer the polish to it and then roll it across your finger nail to transfer it from the stamp to your nail. I find it easiest to put my finger against the table so that I can ensure that there is no sliding relative to the stamp.
 Lift off the stamp and hopefully there will be a clean transfer! Let the transfer dry for a little while and then use a clear-coat varnish on top to help preserve the fine details.
 There are some more photos from both classes with additional ideas for neat things to do with your nail art.