PDP-11 Booting
Bootup
 Turn on the VT100 using the switch in the back. It should beep and warm up in a few seconds and display a blinking cursor in the upper left. If you get garbled text or no image, STOP and contact someone to help debug.
 If you're using the ASR-33, STOP and reconsider. Go back to the display terminal unless you have your own roll of paper.
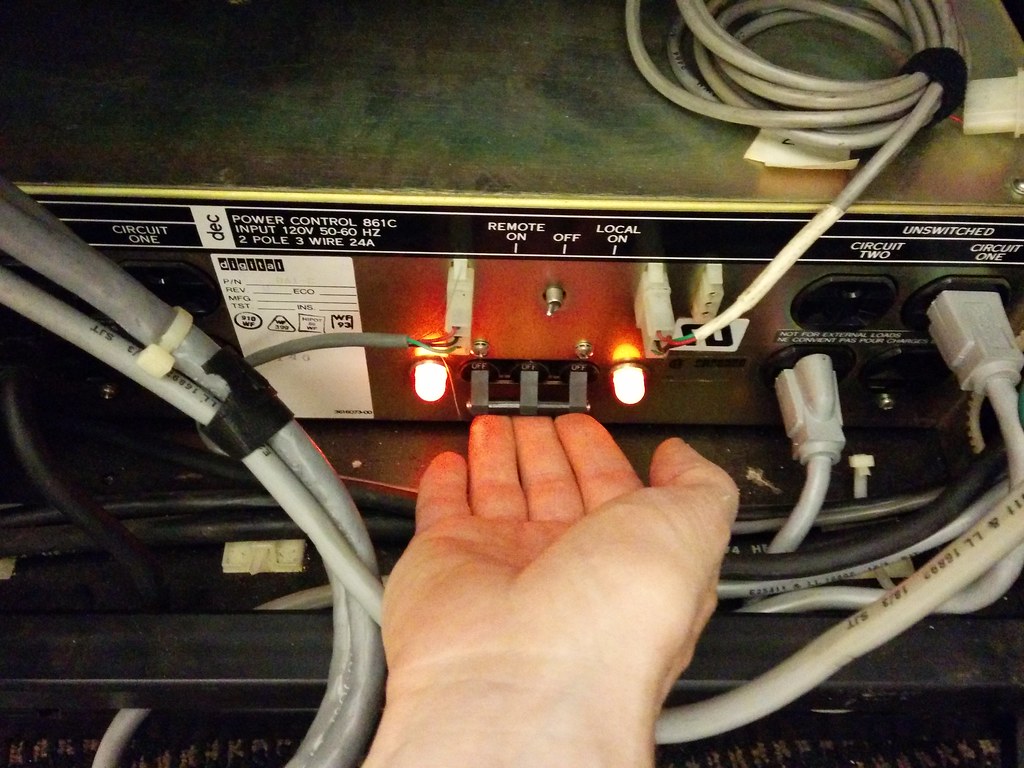 Turn on the main PDU at the bottom of the rack. The single cabinet PDP-11 has this in the front, and in the dual rack machine this is in the back in the right-rack. Note the "Remote/Local On" switch -- the remote position allows the AC switch on the front panel to turn on the PDP power supply.
 Spin up the RL01 disk pack by pushing the LOAD button if it is popped out. If it is depressed, this means someone shutdown the machine without unloading the drive pack.
 Turn the large front panel switch to "DC ON". The fans in the CPU cage will come online and all of the drives will also make some noise.
 Since this PDP-11 has a bootstrap ROM on the terminator card, you can jump into by holding CNTRL and then pressing BOOT. You can also try writing a bootstrap program using the octal keyboard -- the cheat-sheet has some instructions to toggle in.
 If all goes well, the boot monitor program will be running now and have printed a status message to the VT100. The four octal values are registers r0-r3, I believe. Type
 DL⏎ (in caps, of course) to jump into the "DL" bootrom, which will load the OS from the RL01 device. DK⏎ will select the RK05 decpack.
 RT-11SJ V04.00 will startup and execute the startup script. You might need to adjust the time and date. Just don't try to go past y2k.
 Finally, type
 RUN ADVENT to start adventure and begin exploring the Colossal Cave. You can also try [HELP](https://www.flickr.com/photos/osr/14008886427/in/set-72157644327706146/lightbox) to get a list of RT11 commands.
Changing RL01 disks
 Hit the LOAD button and wait for the drive to spin down. When it is done, you'll hear a clunk and the LOAD light will come back on.
 Slide out the RL01 cabinet and open the top. The bottom of the drive pack should be resting in the recess -- lift it off, then slide the latch to the left while lifting the handle. There should be a clunk as the magnets release and the drive pack comes free. Install the next drive pack, lower the handle, place the cover ontop, close the lid and slide it back into the rack. Press LOAD again to mount the drive.
Shutdown
 It is very important that you unmount the drives before shutting down! The RK05 heads will crash since the backup batteries have long since died. Hit LOAD and wait the thirty seconds until the loud clunk lets you know that the drive is safe. Open the front door and remove the decpack.
 DO NOT LEAVE A DECPACK IN THE RK05 It will be damaged and likely damage the drive as well. Someone will have to open the case and check on the heads. Don't do it!
Hit the LOAD button any of the RL01 drives that are mounted -- the button should pop out and eventually the light will come back on to let you know that the drive is safely unmounted.
 |
 |
Once all the media has been unmounted (you did unmount and remove the media, right), turn off front panel switch to "DC OFF" and turn off the PDU at the bottom of the rack. Finally switch off the VT100 (since we don't have the screen saver upgrade) and you're done!